Garmin SteadyCast™ Heading Sensor Review
Garmin SteadyCast™ Heading Sensor, commonly referred to as a Garmin heading sensor. This simple, easy-to-install solution, providing both rapid calibration and unparalleled premium heading accuracy. It makes your chartplotter much more accurate. But what makes SteadyCast’s calibration so unique? And why is it becoming the best heading sensor worldwide?
In this article, we will delve deep into a detailed Garmin SteadyCast™ Heading Sensor. We’ll explore its specifications, compatible devices, and the essential accessories that accompany it.
As a result, questions arise regarding Garmin SteadyCast™ Heading Sensor Review. And to round it all off, we’ll address some frequently asked questions to ensure you have a complete understanding of Garmin SteadyCast™ Heading Sensor.
Let’s get started.
Definition of What is SteadyCast in the context of Garmin Fish Finders?
Steadycast is essentially an electronic compass. Its primary function is to show the direction in which the front of the boat is pointing. To achieve accurate readings, it’s crucial to calibrate the Steadycast.
When used correctly, if you’re on a calm lake and driving in a perfectly straight line, the heading displayed by the GPS and the Steadycast will match, provided the Steadycast has been calibrated.
Definition of What is Calibration in the context of SteadyCast™ Heading Sensor?
Calibration for the Garmin SteadyCast™ Heading Sensor means adjusting it to give correct direction readings.
This adjustment fixes errors caused by how it’s installed, nearby magnetic fields, and other outside factors.
In simple terms, it ensures the sensor points in the right direction.
What Does the Garmin SteadyCast Heading Sensor do? Importance?
Without a heading sensor, the chartplotter will rely on a GPS heading (COG) which will only be accurate when the boat is moving.
The GPS heading is reliable only when the boat is in motion. If the boat is stationary or moving at an extremely slow pace, the GPS might not accurately indicate the direction in which the boat’s bow is pointing.
For instance, if the wind pushes the boat sideways, the GPS heading might show a direction that’s 90 degrees off from the actual direction of the boat’s bow.
In situations where precision is required, such as lining up a cast to a specific waypoint, the Steadycast becomes invaluable. It provides the accurate heading, indicating the exact direction to cast.
Garmin Steadycast Heading Sensor Specifications:
- Dimensions: The sensor measures 3.4 inches in length, 2.1 inches in width, and 1.3 inches in height. In metric units, that’s 86.3 x 52.9 x 33.7 mm.
- Heading Output: By default, the sensor provides a heading output at a rate of 10 Hz.
- Accuracy: The device boasts an impressive accuracy, outputting heading data with a precision of +/- 3 degrees.
- Water Resistance: With an IPX7 water rating, the Steadycast is designed to withstand accidental immersion in water up to 1 meter for up to 30 minutes.
- LEN (Load Equivalency Number): The sensor has a LEN of 2, indicating its power consumption in an NMEA 2000 network.
- Operating Voltage: The Steadycast operates efficiently within a voltage range of 9 VDC to 32 VDC.
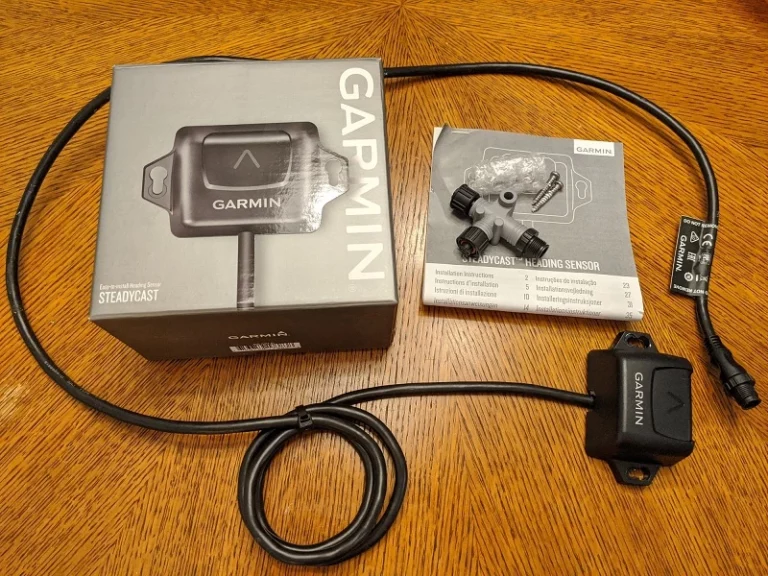
What's Included in the Garmin Steadycast Heading Sensor Box:
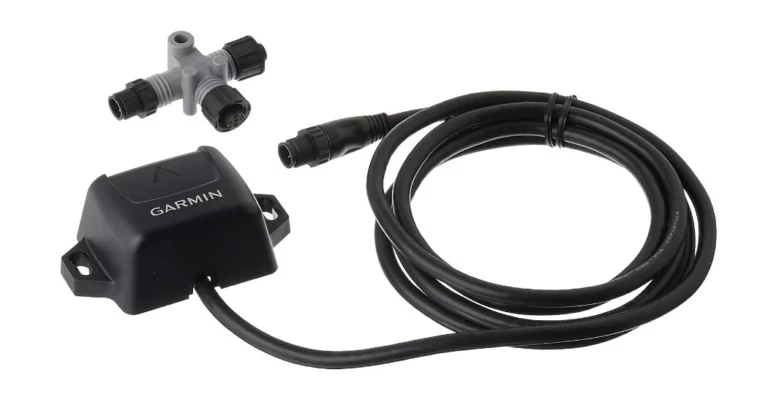
- SteadyCast Heading Sensor: The main unit comes with an integrated NMEA 2000® drop cable that is 6 feet in length.
- NMEA 2000® T-Connector: This component is essential for integrating the SteadyCast into an NMEA 2000 network.
- Documentation: The box includes official documentation, which provides detailed instructions and information about the product.
Garmin Steadycast Heading Sensor Accessories:
Category Accessory Description
NMEA 2000® Backbone/Drop Cables 2 m/6 ft
6 m/19 ft
10 m/32 ft
0.3 m/1 ft
4 m/13 ft
Right Angle, 2 m/6 ft
NMEA 2000® Connectors Field-installable Connector, Male
Field-installable Connector, Female
NMEA 2000® Terminators In-line Terminator
Male Terminator
Female Terminator
NMEA 2000® Power Components Network Updater
Power Cable
Power Isolator
NMEA 2000® Kits and Additional Accessories Starter Kit
T-connector, 1 Port
Multi-port T-connector, 4 Ports
Weather Cap
Tools Needed - SteadyCast™ Heading Sensor
- Safety glasses
- Drill
- 3.2 mm (1 /8 in.) drill bit (a larger pilot hole drill bit may be required for hard or brittle mounting surfaces)
- 25 mm (1 in.) drill bit for a cable-passthrough hole (optional)
- Phillips screwdriver
- Cable ties
- Portable or handheld compass (to test for magnetic interference)
- Additional screws appropriate for the mounting surface, if needed

Software Update
You should update the software on all of your Garmin® devices when you install this device.
The software update requires a Garmin NMEA 2000® Network Updater accessory or a Garmin chartplotter connected over the NMEA 2000 network (sold separately).
Garmin devices support up to a 32 GB memory card, formatted to FAT32.
Loading the New Software on a Memory Card
You must copy the software update to a memory card using a computer that is running Windows® software.
NOTE: You can contact Garmin customer support to order a preloaded software update card if you do not have a computer with Windows software.
- Insert a memory card into the card slot on the computer.
- Go to www.garmin.com/support/software/marine.html.
- Select GPSMAP Series with SD Card.
- Select Download next to GPSMAP Series with SD Card.
- Read and agree to the terms.
- Select Download.
- Choose a location, and select Save.
- Double-click the downloaded file.
- Select Next.
- Select the drive associated with the memory card, and select Next > Finish.
A Garmin folder containing the software update is created on the memory card. The software update can take several minutes to load onto the memory card.
Updating the Device Software
Before you can update the software, you must obtain a software-update memory card or load the latest software onto a memory card.
- Turn on the chartplotter.
- After the home screen appears, insert the memory card into the card slot.
NOTE: In order for the software update instructions to appear, the device must be fully booted before the card is inserted.
- Follow the on-screen instructions.
- Wait several minutes while the software update process completes.
- When prompted, leave the memory card in place and restart the chartplotter manually.
- Remove the memory card.
NOTE: If the memory card is removed before the device restarts fully, the software update is not complete.
Garmin Heading Sensor Mounting Considerations
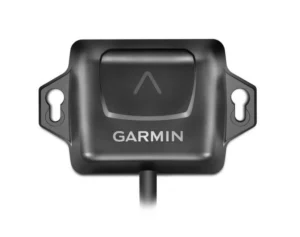
You can install the sensor with the cable either routed through the side of the sensor housing, or with the cable routed through the mounting surface under the sensor.
For best performance, observe these considerations when selecting a mounting location.
The sensor should not be mounted near known ferrous metal objects such as a toolbox or compass.
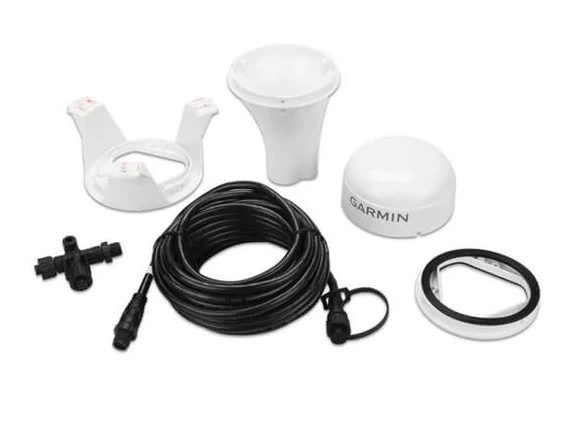
The sensor is not a GPS device, and is not required to have a clear view of the sky.
A handheld compass should be used to test for magnetic interference in the area where the sensor is to be mounted.
Your boat, motors, and devices must be on during the test. If the needle on the handheld compass moves when you hold it where you intend to mount the sensor, magnetic interference is present.
You must choose another location and test again.
Mounting screws are provided with the sensor. If you use mounting hardware other than the provided screws, the hardware must be made of quality stainless steel or brass material to avoid magnetic interference with the sensor.
You can mount the sensor with the cable along the mounting surface or with the cable routed through the mounting surface under the sensor.
- Select a mounting location.
- If you plan to route the cable through the mounting surface, use a 25 mm (1 in.) drill bit to drill the cable-passthrough hole into the mounting surface at the selected mounting location.
- If necessary, route the cable through the cable passthrough hole.
- Using a bit appropriate for the mounting surface and mounting hardware, drill two pilot holes (optional).
- Secure the sensor to the mounting surface, observing these guidelines for best performance:
- If you are using your own mounting hardware instead of the included screws, test the hardware for magnetic interference.
- Do not use excessive force when installing mounting screws. Use only the amount of force needed to keep the sensor in place.
- Apply force evenly between the mounting screws.
- Install the mounting screws perpendicular to the mounting surface (not at an angle). The heads of the screws should rest in the center of the grooves.
Route the cable to the NMEA 2000 network.
If you routed the cable through the mounting surface, fill the cable hole in the side of the sensor with marine sealant (optional).
NMEA 2000 Connection Considerations
This sensor connects to an existing NMEA 2000 network on your boat. If the integrated NMEA 2000 drop cable is not long enough to reach your NMEA 2000 network, a drop cable extension of up to 4 m (13 ft.) can be used, according to the NMEA 2000 guidelines.
Item Description
1 Heading Sensor
2 NMEA 2000 power cable (existing; not included)
3 Ignition or in-line switch (existing; not included)
4 12 Vdc power source
5 NMEA 2000 T-connector (included)
6 NMEA 2000 terminator or backbone cable (existing; not included)

Garmin Heading Sensor Calibration
Why do I need this?
When you’re out on the water, knowing the direction you’re heading can be crucial.
This Garmin sensor helps you determine your boat’s heading accurately.
Whether you’re sailing, fishing, or just enjoying the sea, this sensor ensures you’re on the right path.
What does this sensor do?
This is a heading sensor. Think of it like a compass, but more advanced.
It shows you which direction your boat is pointing.
But before it can work perfectly, it needs some initial setup – that’s called “calibration“.
Menu-Based Calibration and Basic Calibration
Performing Menu-Based Calibration
Before you can perform menu-based calibration, you must connect the sensor to the same NMEA 2000 network as a compatible Garmin chartplotter. If the sensor has not been calibrated successfully, a message appears each time you turn on a compatible Garmin chartplotter.
- From the sensor calibration screen, select Compass Cal..
TIP: You can open the calibration page at any time by selecting the device from Menu > Settings > Communications > NMEA 2000 Devices.
- Select Begin.
- Follow the on-screen instructions until the compass calibration is complete, taking care to keep the boat as steady and level as possible.
The boat should not list during calibration.
If possible, you can turn the vessel in place by engaging two engines in opposite directions.
When the compass calibration is complete, a value appears near the Compass Cal. setting. A value near 100 indicates the sensor was installed in a perfect magnetic environment and calibrated correctly. If the heading performance is unacceptable, and the value is closer to 0 than it is to 100, you might need to relocate the sensor and calibrate the compass again.
- Select Auto Heading Alignment.
NOTE: Auto Heading Alignment is available only if there is a GPS source connected to the NMEA 2000 network. If you do not have a GPS source connected, you must perform the Fine Heading Alignment instead.
- Select Begin.
- Follow the on-screen instructions until the alignment is complete.
Adjusting the Fine Heading Alignment
If you do not have a GPS source connected to the NMEA 2000 network, Auto Heading Alignment is not available as part of menu-based calibration, and you must adjust the Fine Heading Alignment instead.
You can adjust the Fine Heading Alignment in conjunction with Auto Heading Alignment to fine-tune the heading output (optional).
- From the sensor calibration screen, select Fine Heading Alignment.
- Using a landmark or a known good compass, determine the heading of your boat.
- Adjust the heading until it matches your measurement.
- Select Done.
Performing Basic Calibration
If you connect the sensor to a NMEA 2000 network without a compatible Garmin chartplotter, you must perform basic calibration instead of menu-based calibration.
You must be able to view heading data from the sensor on a connected chartplotter or marine display before you can perform basic calibration. If you cannot view heading data on your connected display, check the NMEA 2000 network and power connections.
All other sources of heading data that are not based on GPS must be removed from the NMEA 2000 network while performing basic calibration.
When performing basic calibration, you first calibrate the compass and then align the heading in one continuous procedure. If you installed the sensor with the cable pointing toward the bow, parallel to the keel, it may not be necessary to align the heading.
NOTE: If you choose to align the heading, you must connect a GPS source to the NMEA 2000 network. The boat must be able to reach a cruising speed of at least 6.4 km/h (4 mph) to perform the heading alignment.
- Drive the boat to a location with calm, open water.
- Set the display to view heading data from the connected sensor.
- Disconnect the sensor from the NMEA 2000 network or turn off the power to the NMEA 2000 network.
- Wait while the boat becomes level and stationary.
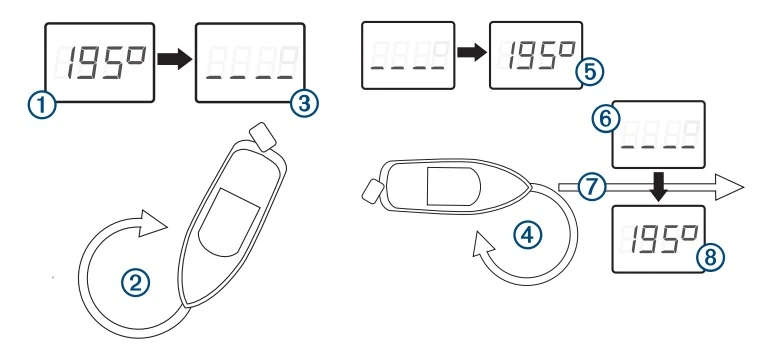
- Turn on power to the sensor, and wait until the heading data appears on the display (1)
- Within three minutes, complete two full, slow, tight circles (2), taking care to keep the boat as steady and level as possible. The boat should not list during calibration. If possible, you can turn the vessel in place by engaging two engines in opposite directions. When the sensor is prepared to calibrate the compass, the heading data disappears from the display (3) You may receive an error message that the heading was lost. You can ignore this message.
- Continue turning in the same direction at the same speed (4) for approximately 1 1 /2 rotations until the heading data appears (5).
When the heading data appears, the compass has been calibrated successfully, and you can align the heading (optional).
- Select an option.
- If you want to align the heading to match the front of the boat, proceed to the next step.
- If you installed the sensor with the arrow pointing parallel to the front of the boat, and do not want to align the heading, stop turning and wait, keeping the boat stationary. Over the next two minutes the heading data should disappear and then reappear. When the heading data reappears, the compass should be calibrated and no heading offset should be applied.
NOTE: If an unwanted heading offset is applied, you must disconnect all GPS sources from the NMEA 2000 network, and repeat the calibration. If the only available heading display is also a GPS source, you must repeat the calibration, and disconnect the sensor after step 7.
- Continue turning in the same direction at the same speed for approximately ten seconds, until the heading data disappears from the display (6).
- When it is safe, straighten the boat and drive in a straight line (7) at cruising speed (must be at least 6.4 km/h (4 mph)) until the heading data appears (8). When the heading appears, the compass has been calibrated, and the heading has been aligned on the sensor.
- Test the results of the calibration, and repeat this procedure if necessary.
Restoring Factory Default Settings
If you relocate the sensor or do not believe the calibration was successful, you can delete all calibration information from the sensor, and restore its factory default settings.
After restoring the factory default settings, you must configure the sensor before you can use it with your system.
- Select Settings > Communications > NMEA 2000 Devices > Device List.
- Select the name of the sensor.
- Select Review > Factory Defaults > Yes.
Specification Measurement
Dimensions (L x W x H) 87.35 x 53.84 x 34.29 mm (3.4 x 2.1 x 1.4 in.)
Weight 182 g (6.4 oz.)
Temperature range From -15° to 70°C (from 5° to 158°F)
Material Fully gasketed, high-impact plastic
Water resistance IEC 60529 IPX7*
NMEA 2000 input voltage From 9 to 32 Vdc
NMEA 2000 LEN 2 (100 mA)
Compass-safe distance 5 cm (2 in.)
Exceptional accuracy in all weather conditions.
Easy installation process.
Minimal maintenance requirements.
Compatibility with a wide range of Garmin chartplotters and marine navigation systems.
Higher price compared to some competitors.
May require initial calibration for optimal performance.
FAQs: Garmin Steadycast Heading Sensor
Conclusion
In conclusion, the Garmin Steadycast Heading Sensor is a reliable and high-performance device that delivers accurate heading information for boaters. Its advanced features, ease of installation, and exceptional accuracy make it a standout choice in the market.
While it may come at a slightly higher price point, the long-term benefits and peace of mind it provides make it an invaluable addition to any vessel.
Whether you’re a recreational boater or a professional sailor, the Garmin Steadycast Heading Sensor is a worthwhile investment for enhancing navigation safety and efficiency on the water.
Gary Burrell
Born in 1989, Gary Burrell is an Electrical Engineering graduate from the University of Tennessee. With 20+ years of experience, he has transitioned from engineering roles to becoming the Chief Content Editor. Gary’s unique blend of technical knowledge and editorial expertise has made him an essential figure in content creation, ensuring clarity and accuracy. His journey from an engineer to an editor showcases his adaptability and commitment to continuous learning.

