In this guide, we’ll explore the settings of the Garmin fishfinder chart plotter. A common question is which settings are best for 2D Sonar, SideVü, DownVü, and chart plotter to successfully identify fish, cover, and structure in the water.
Today, we’ll go through the unit from top to bottom, explaining each setting. This way, you can apply this knowledge to your device and set it up similarly.
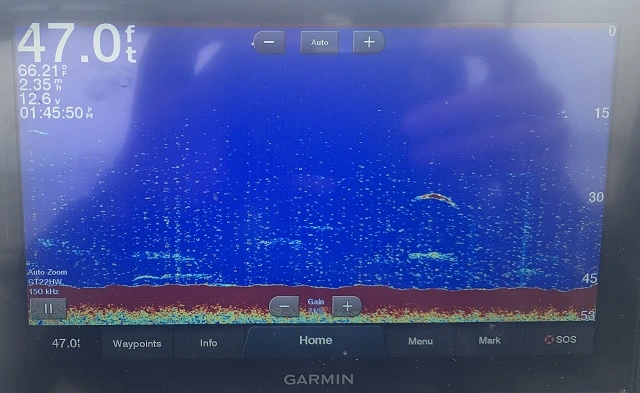
For your convenience, each section, whether it’s side view, down view, or chart plotter settings, will be broken down in the description below. Let’s see, from the below screen:
Garmin Fish Finders Setup Screen
Turning On Garmin Fish Finder
First thing first, we are going to Turning On Garmin Fish Finder. To help you understand better, I will guide you through some simulation screenshots. This will make it easier for you to understand the settings of the fishing fish finders. It will feel like you’re actually out on the water.
This is the homescreen of the Garmin fish finder. You have many different options and groupings.
Favorites: Where you can easily access your favourte chart combinations.
Smart Mode: It has a variety of different modes that garmin has built into your unit.
Combo Section: This tree can create different combinations. You can display different screens by using these combinations to navigate your charts and sonar. The screens include a 2D view, a down view, and a side view. They also include a chart view, among others..
Charts: You can use various charts, like fishing maps or 3D navigation charts, for guidance.
Sonar: You can choose different sonar types on your screen, like DownVu, SideVu, and Split Zoom. You can also use LiveVu Down, LiveVu Forward, or RealVu 3D. Another option is FrontVu or your panoptix settings.
Radar: If you have a panoptix transducer, you can change settings. These settings include Single Range, Dual, Overlay, and Dual Overlay.
A/V Guages Controls Settings: This is where you can hooked up with bunch of little accessories that garmin offers for us.
Garmin Fish Finders Settings - Home Screen
From the above Home Screen
If you’re new to Favorities, let’s talk about the “SETTINGS MENU” first. This is where we’ll set up the unit.
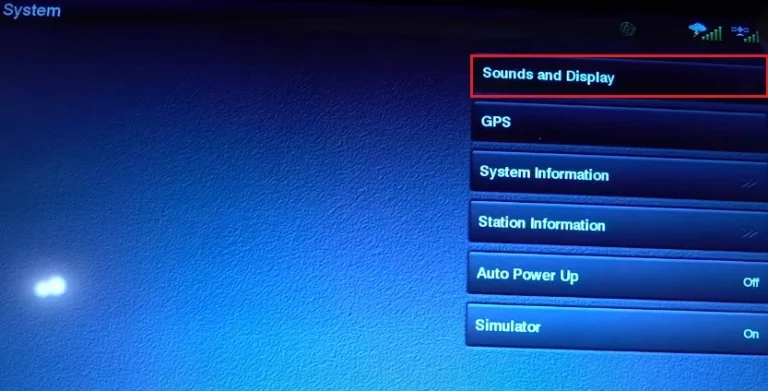
To start, go to SYSTEM > Sounds and Display. There, you’ll find 3 options: Beeper (Off), Backlight (Max), and Backlight Sync (On). You’ll also see Color Mode (Day Colors) and Video Out Aspect (Standard). Lastly, check the Startup Image.
Personally (I turn all of my sounds off) - Do not want sounds beeping at me every time I touch a button so I turn off Beeper.
Backlight on the screen is currently set to Max.
Current Colar Mode is day colors (I do not want to automatically click into the night colors).
You can see from the below image, when I select / switch to auto, it automatically pulls into night colors because it is after a period of time in night (which is nice if you are in water at certain times but especially in the morning when you get out on the water and you do not think your graphs working it might be because of night colors and cannot see graphs lighting-up because, there is not enough backlight.
(My suggestion is to always select “Day Colors”).
Video Out Aspect: Select as Standard.
StartUp Image: Here if you’d like, you can chip in over the side here and make a startup image so when you turn your graph On, you can have a certain image (On my screen - I do not have any)
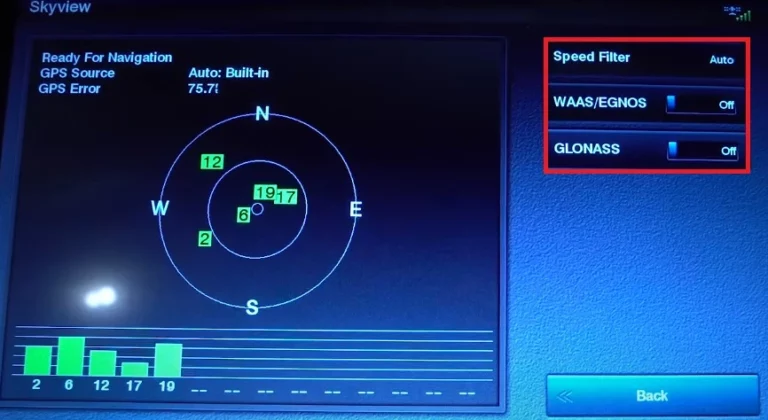
GPS Skyview: This is where you get a bunch of your data for your GPS coordinates and adjusting Speed Filter, WAAS / EGNOS, GLONASS.
System Information: Basically, you can pull into a bunch of different system information pertinent to your garmin device.
Station Information: It is also very similar, pairing with different things.
Auto Power Up: Off
Simulator: On
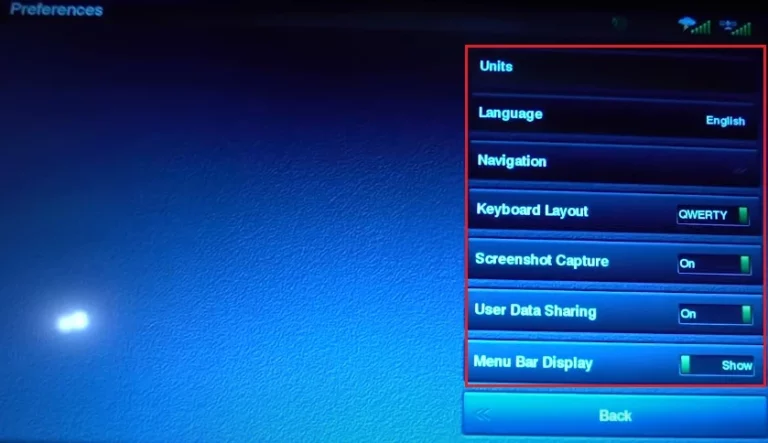
Preferences: This is where you can change your units,
North Reference: Mag
Variation: Auto 006”W
Position Format: hddd°mm.mmm’
Map Datum: WGS 84
Time Zone: Auto (Because, If I change into a different time zone, I do not have to have to remember to change my time zone to whatever time I am currently.
Language: English
Navigation: Route labels (Show Name), keyboard layout (QWERTY Screen), Screenshot Capture (On), User Data Sharing (On), Menu Bar Display (Show)
Communications: You can set-up as you’d like - NMEA 0183 Set-up, NMEA 2000 Set-up, Marine Network, Wireless Devices, Wi-Fi Network (you can control the network name, password, and other various settings.
Alarms: You can set up navigation, system, sonar, collision alarm, weather, fuel
Navigation: Arrival, Anchor Drag (Off), Off Course (Off)
System: If you want VOLTAGE ALARMS or CLOCK ALARMS, you can have a set so if you are out on the water, you need to be off at a certain time you can set a clock alarm.
Sonar Alarms: If you are in shallow water or deep water or if there is a water temperature or if you watch wicked tuna, they have a fish alarm on that’s why their graph beep when they say there is a fish on the screen (If the fish alarm is ON).
Vessel: You can adjust different things in here.
Garmin Fish Finder Sounds and Display Settings
Garmin Fish Finder Backlight Settings
Garmin Fish Finder Skyview Settings
Garmin Fish Finder Preferences Settings
Garmin Fish Finders Communications Settings
Alarms Settings
Sonar Alarms
My Vessel Settings
So, that is with the SETTINGS menu. Now, we shall discuss about the home screen. In this screen, we can immediately go into “Nav. Chart”.
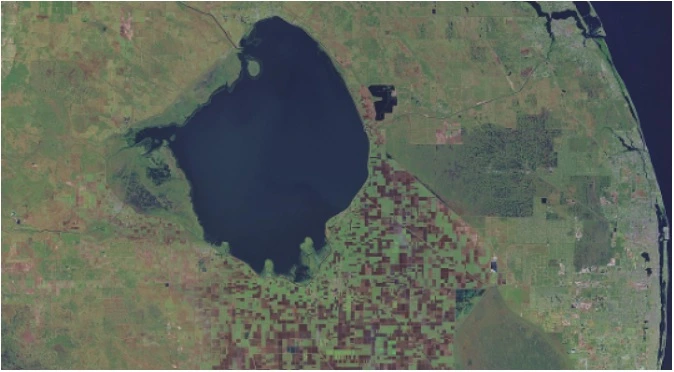
So, when you are In Nav.Chart, as I mentioned we are in simulation settings. We are going to the body of the water inland somewhere where, we actually have good mapping.
Let’s go to okeechobee,
On the screen, you can Zoom-In / Zoom-Out to get more depth contours.
Depending on the map they have pulled up so, as you can see all you have to do is to move your cursor around is touch your screen unit.
Garmin Fish Finder Nav.Chart Settings
On the screen, you can Zoom-In / Zoom-Out to get more depth contours.
Depending on the map they have pulled up so, as you can see all you have to do is to move your cursor around is touch your screen unit.
In the screen, you can see that the depth shading feature is ON (This is something that can help you go out and catch more fish, and it will identify areas that these fish might be holding that might not otherwise notice without the depth shading ON.
So, on this screen we are going to select MENU, we are going to nodge Navigation Chart Menu >> Waypoints and Tracks >> ON
My WayPoints, you can see below the variety of options here, where you can review, sort, filter search, new Waypoint.
In the New Waypoint, you can either enter coordinates or use the chart.
When you select “Use Chart”, it will ask you to go to a certain point on the chart like this below;
Garmin Fish Finder Navigation Chart Menu Settings
Garmin Fish Finder WayPoints Review
Garmin Fish Finder WayPoints and Tracks
Garmin Fish Finder New Waypoint Settings
Certain point on the chart so you want to go there you would select or if you do not want to drop a new Waypoint you can click on Cancel or you can your current position it will drop your waypoint wherever you are right now.
Also, you can choose any of these waypoints and navigate to it will take you to that waypoint. Waypoint display how do you want these Waypoints displayed, you display them all as certain icons or you can have them display just whatever they are.
Active Tracks, you can have your active tracks On, you can have your record mode Off, internal resolution, and the track color is white.
Garmin Fish Finder Cancel Settings
Garmin Fish Finders Active Tracks Settings
Garmin Fish Finder Tracks Settings
You can also go into save tracks on the screen.
Can always use that to run up that river and you never have to wonder where the that track was and then routes you can build routes for yourself.
If you want to go from Point A to Point B but it is not a straight way, you can build a route in that section there.
Garmin Fish Finder Activ Track Options
Garmin Fish Finder Saved Tracks Settings
Garmin Fish Finder Routes Settings
Garmin Fish Finder Waypoints and Tracks Settings
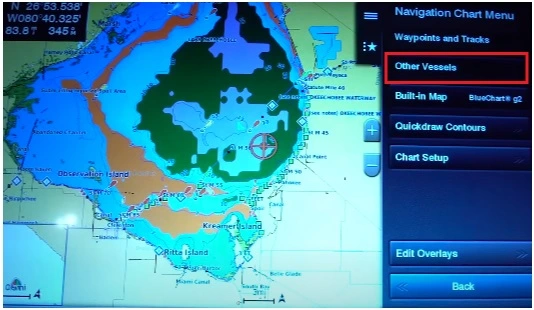
Next, Other Vessels
Operating the Other Vessels, this is something if you have other devices hooked into this, I do not play around in this menu.
Then, you can adjust your built-in map for the Garmin GPS Maps, you get two built-in maps, you get your Lakeview HD as well as your Blue Chart G2.
Your Blue Chart G2 are your BIG WATER NAVIGATION charts in your LakeVu HD or your inland bodies water.
One thing Garmin is good about is providing incredibly accurate one foot contours, the LakeVu HD is the best.
If you are fishing the Greak Lakes, or big water.
There are some differences (i.e;) the Blue Chart G2 will show you one thing and LakeVu HD will show you something just a little bit different. So, it might give you an advantage over the other.
So, it is upto you to rotate between the two.
Garmin Fish Finders Other Vessels
Built-Up Map in Garmin Fish Finder
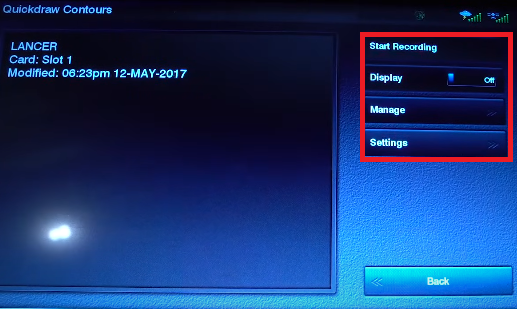
Quickdraw Contours
This is an awesome feature that Garmin has, where you can map your own lakes you put a GPS or you can put your SD card in the unit and start recording and driving around using your SideVu or your 2D sonar.
You can use the Quickdraw Contours to map that different contour swing.
Quickdraw Contours Options
Quickdraw Contours Options in Garmin Fish Finders
Client SetUp
Here you can adjust your tides and currents your Roses which are different like Inset Map, Weather, Chart Apperance.
Client Setup options in Garmin Fish Finders
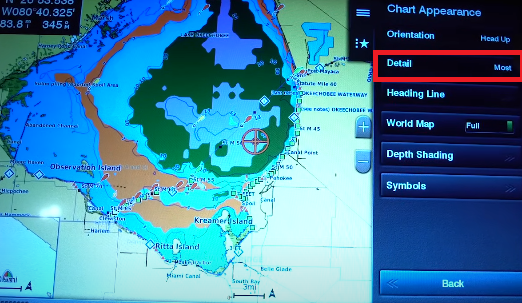
Chart Apperance
This is where you really get into like your depth shading: -
Orientation >> Head Up (Whatever direction you are pointing that is the direction that is at the top of the chart on the graph up front.
Because, sometimes on the big water you do not have reference points so with north-up you always know a certain areas up whatever wave your boat is pointing is the direction that your are facing.
Chart Appearance in Garmin Fish Finders
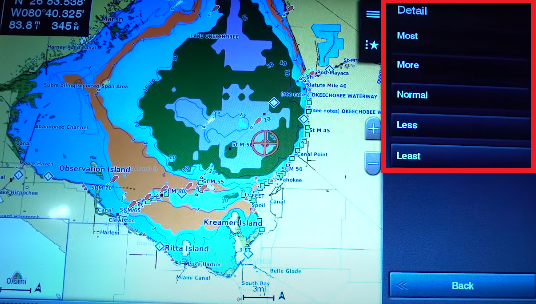
Detail
You can select the “Most”
When you are fishing and if you want ONE FOOT CONTOURS but if you do not wish all thise contours, you can drop it down to one of the option inside it.
Chart Appearance Detail Options in Garmin Fish Finders
Chart Appearance Detail Inside Features in Garmin Fish Finders
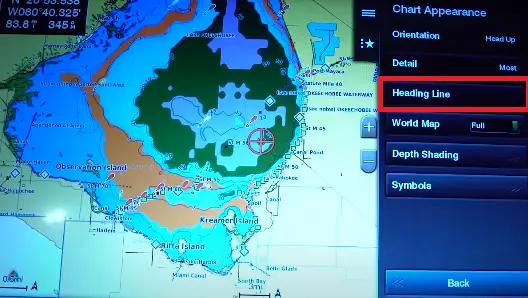
Heading Line
In the heading line, this will show like a line in the direction you heading, you can either set this to OFF or ON.
Chart Appearance Heading Line Options in Garmin Fish Finders
Chart Appearance Heading Line Inside Features in Garmin Fish Finders
Depth Shading
This is something a lot of people underestimate its important of depth shading, in the below screen shot I have depth shaded all the way upto to 25 feet, and the reason we like this is let us say there is a contour swing between 14 and 17 foot and you want to see like a little hump in the middle of the lake Okeechobee.
It is very easy to identify areas that might not otherwise show up very easily.
Depth Shading Options in Garmin Fish Finders
Depth Shading Features in Garmin Fish Finders
NAV+SideVu
Now, we can see the SideVu, if you want to choose one of these two, you simply touch and whatever segments that you want to open-up then you click on this and it will expand to that whole page.
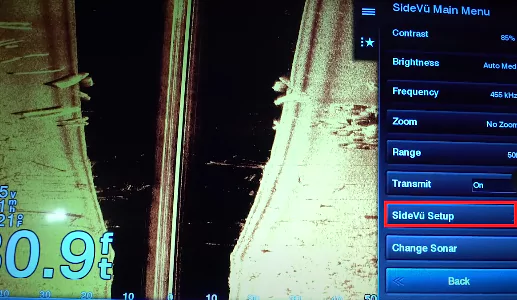
Here you can set the contrast from 0% to 100% - Typically, I suggest is 85%. Where a fish a lot other than the great lakes there is actually relatively soft bottom so, the 85% gives me the best reading.
Nav+SidevU in Garmin Fish Finders
SideVu Main Menu Adjustment in Garmin Fish Finders
Contrast Options In Garmin Fish Finders
Brightness Settings in Garmin Fish Finder
The brightness is set to auto medium - For us, this is a good medium point for us, but if we really wanting to see further out like let’s say bump this upto 120 feet, we are going to bump this is upto to auto high although high is gonna give you a little bit brighter return and it is going to give you the ability to see a little bit further out as you expand your view range.
So, auto-medium is pretty much always where I have a set unless we are going over a 100 feet.
Brightness Settings in Garmin Fish Finders
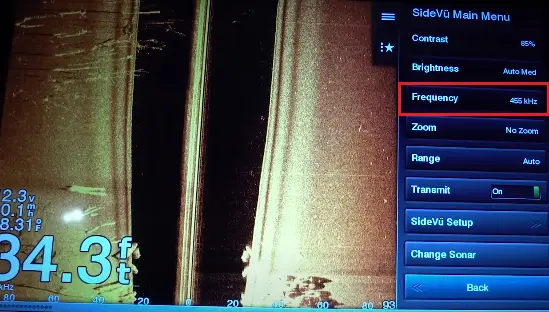
Frequency Settings in Garmin Fish Finder
The frequency is 455 kilohertz, and we almost set to no Zoom.
Let’s say you want to just scan docks on the right side of the boat.
You can do a zoom like this and on this bottom graph segment you can set it so up here your zoom is set to right side of the boat.
SideVu Main Menu Frequency Settings in Garmin Fish Finders
Range
If you are 15 foot deeper, you can change it to about a 120 feet and it going to allow us to look further out from the side of the boat and it give us a very good reading out that far.
If you are between 15 and 10, then you need to set to around 70 feet and if you are less than 10 feet of water, no more than 50 feet.
50 feet is a max and that is going to give you the best reading in that shallow water so the shallow you are, the smaller you want your range to be
Range Settings in Garmin Fish Finders
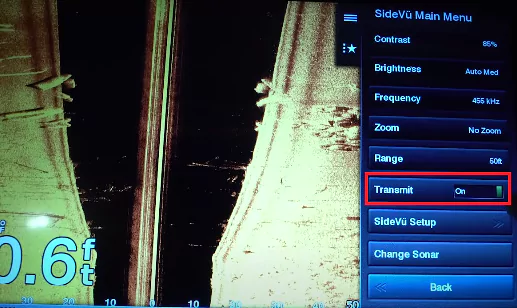
Transmit
Obviously, you should keep it ON,
If you do not want it ON, let say you do not want your unit chirping, you can turn it to OFF.
Transmit Settings in Garmin Fish Finder
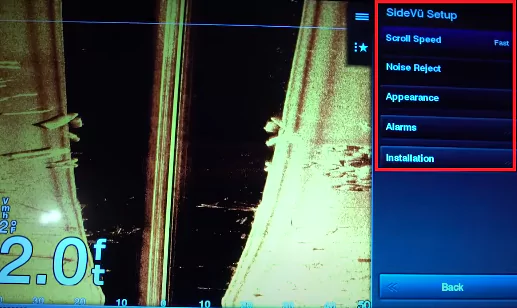
SideVu Setup
In the SideVu Setup, we have set our scroll speed to FAST, and now Garmin does have this thing called ULTRA Scroll (Very very quick).
We just kept ours as FAST, that is why we get the best reading from our unit.
Sidevu Setup in Garmin Fish Finders
Sidevu Setup Inside Features in Garmin Fish Finder
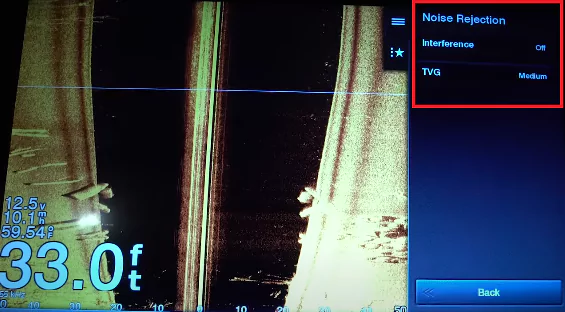
Noise Reject
We have put our TVG to medium.
We do not want Noise Reject because we do want to see whatever’s at the top of the water column sometimes there could be bait right below the surface of the water, and we want to be able to see that so we keep that noise reject off.
Noise Rejection Feature in Garmin Fish Finder
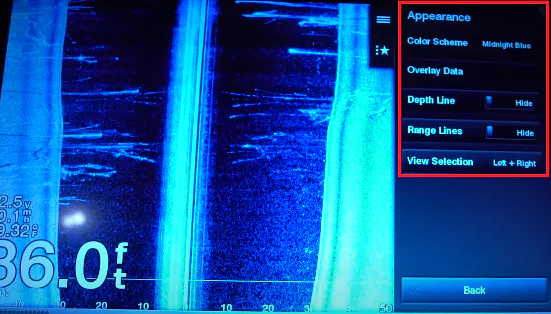
Appearance
Appearance is very you are going to adjust your color scheme, and our favourite color scheme is AMBER, but another great one is midnight blue, especially when it is early in the morning mid-night blue this really nice color scheme.
But, with mid-night blue you are going to have to adjust your brightness down a little bit, mid-night blue has a really strong white return so your going to drop your brightness down when your are using mid-night blue and there is also a ton of other options but our personal preference is Amber.
Appearance Settings in Garmin Fish Finders
Sonar Overlay
You can keep it hidden, and we do not need to know time a day that’s shown in the buttom corner for me over there but this is what we have inset as we keep our depth line and our range lines hidden.
Let’s say you want to know how far out things are you can turn your range lines ON, we do not need to know that we can pretty much these indicators down here and get a good guess.
Sonar Overlay Options in Garmin Fish Finder
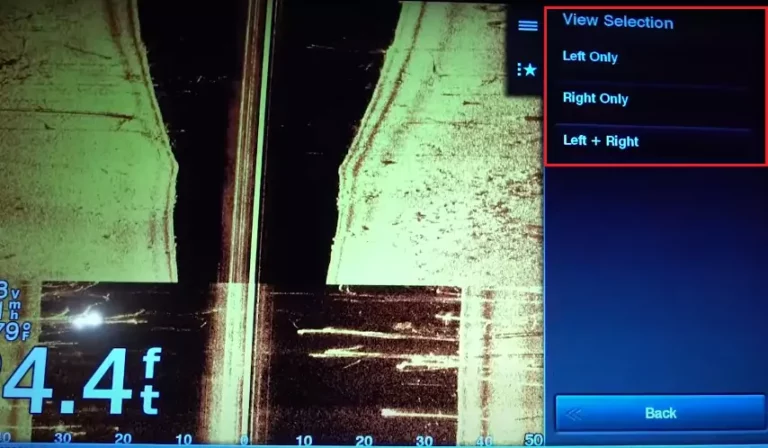
View Selection
If you only want to view to the right of the bow to the left of the boat or you can do so using this view selection in your appearance settings.
Garmin Fish Finders View Selection
Sonar Alarms
You also can adjust your alarms, this something we already touched on but you can adjust in in this field as well and you can change your sonar right in this menu so, let’s say we want to go to Jewish to traditional sonar you can adjust it in here and then we are going to start adjusting the color schemes and everything on traditional sonar.
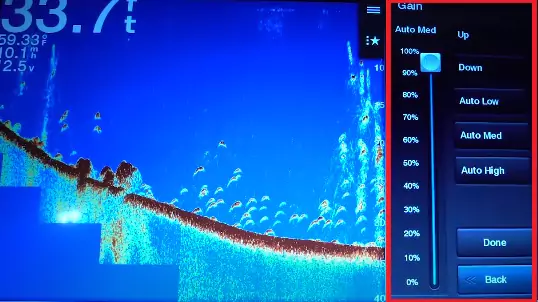
So, in the menu here my gain is typically set around auto medium it just really depends on the return if there is a lot of debris in your water you might drop your return down but auto medium for me again is a pretty easy settings to best cleanest return.
Garmin Fish Finders Sonar Alarms
Garmin Fish Finders Change Sonar Settings
Garmin Fish Finders Gain Settings
Conclusion
For the best results with your Garmin Fish Finder, tweak its settings. Change the frequency, sensitivity, and display based on where you’re fishing. The default settings are okay, but custom ones work better. As fishing spots change, your settings should too. Stay updated, and trust the tech to improve your fishing.
Born in 1989, Gary Burrell is an Electrical Engineering graduate from the University of Tennessee. With 20+ years of experience, he has transitioned from engineering roles to becoming the Chief Content Editor. Gary’s unique blend of technical knowledge and editorial expertise has made him an essential figure in content creation, ensuring clarity and accuracy. His journey from an engineer to an editor showcases his adaptability and commitment to continuous learning.