Garmin Striker 4 Fishfinder Review
Home | Brand: Garmin | Series: Striker Series | Model: 4 | Our Score: 4.9/5
The Garmin Striker 4 casts a line into the market with a splash that’s been felt since its debut on November 4, 2025.
The Garmin Striker series is portable and easy to use. Anglers love its advanced CHIRP technology, and it’s affordable too. This Striker 4 fish finder is perfect for beginners because it’s easy to use. Experienced fishermen also like it because it’s deep. It’s a versatile tool for any fishing trip.
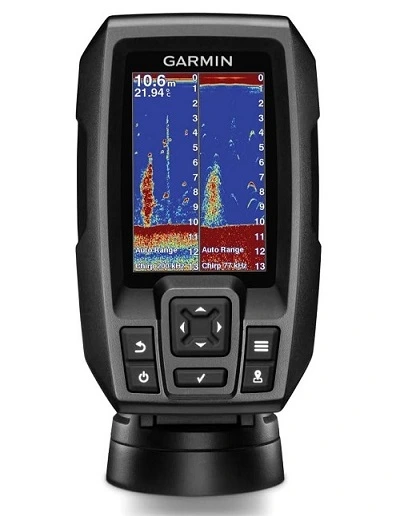
The Striker 4, model 010-01550-00, has a clear 3.5-inch screen. It finds fish and shows them clearly. It weighs only 8 ounces and can measure depths up to 1600 feet with power.
The Striker 4 makes your fishing trips better, improving each cast and catch.
Today, we’ll look at the Garmin Striker 4 Plus review and see why it’s the top fish finder for all anglers.
Garmin Striker 4 Specifications
| Specifications | Garmin Sriker 4 Fishfinder |
|---|---|
| Dimension | 3.6” x 5.9” x 1.6” (91.6 x 150.8 x 42.8 cm) |
| Weight | 0.5 lbs (230 g) |
| Waterproof | IPX7 |
| Display Type | HVGA color |
| Display Size | 1.9” x 2.9” (4.9 x 7.3 cm); 3.5” diag, (8.7 cm) |
| Display Resolution | 480 x 320 pixels |
| Mounting Options | flush, tilt/swivel |
| Input | Keyed |
| Transducer Cable Length | 20 ft |
| Waypoints/Favorites/Locations | 5000 |
| Track Points | 50,000 |
| Tracks | 50 |
| Navigation Routes | 100 |
| GPS | Yes |
| Has Built-In Receiver | Yes |
| Receiver | Traditional: 50/77/200 kHz CHIRP (mid and high) |
| Supports WAAS | Yes |
| Power Input | 10 to 20 Vdc |
| Typical Current Draw | 0.23 A |
| Max Current Draw | 1.0 A |
| Power Consumption | 2.8 |
| Displays Sonar | Yes |
| Traditional Sonar (Dual Frequency/Beam) | Built-in |
| Frequency | Traditional: 50/77/200 kHzCHIRP (mid and high) |
| Transmit Power | 200 W (RMS) |
| Bottom Lock (Shows Return From The Bottom Up) | Yes |
| Water Temperature Log | Yes |
| 4-Pin Transducer Ports | 1 |
| Split-Screen Zoom | Yes |
| Fish Symbol Id (Helps Identify Fish Targets) | Yes |
| Autogain Technology (Minimizes Clutter; Maximizes Targets) | Yes |
| Adjustable Depth Line (Measures Depth Of Underwater Objects) | Yes |
| A-Scope (Real Time Display Of Fish Passing Through Transducer Beam) | Yes |
| Water Temperature Sensor Included | Yes |
| Depth Range Shading | Yes |
Garmin Striker 4 Key Features
Advanced Functionality
The STRIKER 4, featuring a user-friendly keyed interface with dedicated buttons.
Installation is a breeze, and you can choose from 3.5, 5, or 7-inch displays to tailor your fishing experience.
Plus, with an IPX7 water rating, it’s engineered to withstand the elements.
Navigation and Waypoint Mapping
The STRIKER 4 can handle both freshwater and saltwater.
It can go as deep as 1,600 feet in freshwater and 750 feet in saltwater.
So, it’s perfect for any fishing trip you have in mind.
Advanced CHIRP Sonar
Unlock a new level of fish finding with the STRIKER 4’s CHIRP Sonar. To make it easier to find and catch fish, the device sends out a continuous frequency sweep.
CHIRP sends a continuous sweep of frequencies, from low to high. It interprets them individually upon their return. CHIRP sonar improves fish arches by using more frequencies. It makes them clearer. This allows for better target separation.
Built for the Ice and Open Water
The STRIKER 4 has a built-in flasher that shows you real-time sonar data.
Whether you’re ice fishing or vertical jigging, it accurately tells you what’s under the ice or water.
Keypad Operation and CHIRP Transducer
Navigate through the STRIKER 4’s features with a convenient keypad operation. The included CHIRP (77/200 kHz) sonar transducer ensures powerful sonar capabilities, with an option to upgrade for enhanced performance.
Share and Collaborate
Mark your hot spots, boat ramps, and docks, then share them with other STRIKER and echoMAP users. Easily switch between depth-range scales with Smooth Scaling graphics. You won’t lose clarity and can rewind your sonar history to never miss important points.
Upgrade for Excellence
Upgrade your fishing experience by adding a GT8 or GT15 transducer. These transducers make CHIRP better by giving you clearer sonar images and more detail at deeper depths.
What's in the box?
- Striker 4 Fishfinder
- Power/Data Cable
- Tilt/Swivel Mount
- Transducer
- Transom And Motor Mounts
- Documentation
- User Manual (PDF)
- Installation Manual (PDF)
Pros:
- Precise onboard GPS tracking with a 5,000 waypoint capacity and speed display.
- CHIRP transducer and 2D sonar deliver superior underwater imaging.
- Optimal for kayak use with its compact and efficient design.
- Offers premium features at a cost-effective price point.
- The display boasts high-resolution for clear visual feedback.
- Includes a variety of sonar enhancements such as A-Scope, flasher, and UltraScroll.
- Performance remains consistent in both winter and summer conditions.
- Provides dual-frequency operation for flexible sonar imaging.
- Highly portable for anglers on the move.
- Intuitive interface ensures ease of use for all experience levels.
Cons:
- The display size is relatively small.
- Transducer cable clamps could benefit from increased durability.
- Does not offer latitude and longitude information for waypoints.
- Lacks NMEA output for integration with other marine electronics.
If you find yourself in a situation where you lose GPS signal, there are a few steps you can take to address the issue effectively. First, it is important to be vigilant and notice any indication of a lost signal, which is typically denoted by a flashing question mark symbol on the device.
To begin troubleshooting, try to ensure that your device has a clear line of sight to the sky. GPS signals are transmitted from satellites located in space, so any physical obstructions such as buildings, trees, or other objects blocking the view can interfere with the signal reception. By moving to an open area with fewer obstacles, you may improve your device’s ability to reacquire the GPS signal.
If adjusting your location does not resolve the issue, you can attempt to reset your GPS device. This can be done by turning off the device and turning it back on, allowing it to reconnect to the GPS satellites. In some cases, a simple restart can restore the GPS signal.
Additionally, it is worth checking if there are any updates available for your GPS device’s firmware or software. Manufacturers often release updates that can improve the performance and functionality of the device, including the reception of GPS signals. By keeping your device up to date, you may mitigate potential signal loss in the future.
Lastly, if you continue to experience difficulties with GPS signal loss, it may be beneficial to consult the user manual or contact the manufacturer’s customer support for further assistance. They can provide specific troubleshooting steps tailored to your particular device and offer guidance to resolve any persistent issues.
Remember, losing GPS signal occasionally can be a temporary and normal occurrence, especially in areas with limited satellite visibility or during adverse weather conditions. By following these steps and considering the potential factors affecting signal reception, you can increase your chances of regaining a stable GPS connection swiftly.
To customize the Home Screen, follow these steps:
- Begin by accessing the Home screen on your device.
- Look for an option called “Customize Home” and select it.
- This will open up a settings menu where you can make various changes to the Home Screen layout.
- To add new items or features to the Home Screen, explore the available options in the customization menu.
- If you want to add a new layout, locate the option labeled “Add” and select it.
- Within the “Add” submenu, you should find an option titled “Add New Layout.” Choose this option to proceed.
- Once you’ve selected “Add New Layout,” you will have the ability to choose and arrange the functions and elements as desired.
- Feel free to rearrange the items on the Home Screen to create a layout that suits your preferences.
- Additionally, if there are certain items or functions you no longer want on the Home Screen, you can simply remove them using the customization menu.
- Remember to save your changes before exiting the customization settings to ensure that your newly customized Home Screen is applied.
By following these steps, you’ll be able to effectively customize and personalize the appearance and functionality of your device’s Home Screen.
To power on the Garmin Striker, locate the power button and press it and hold it down until the device turns on. The power button is typically positioned on the side or back of the device.
In order to power off the Garmin Striker, you can simply press and hold the same power button until the device shuts down completely. This action may take a few seconds, but it will effectively turn off the device. Remember to ensure that the device is completely powered off before storing it or performing any maintenance tasks.
If you need assistance or support from Garmin, there are several ways to get in touch with them:
- Online Support: Visit the website www.support.garmin.com. Here, you will find information specific to your country, including FAQs and various resources that can help address your concerns.
- Phone Support: Garmin provides phone support for customers in different regions. If you are in the USA, you can call either 913-397-8200 or 1-800-800-1020. In the UK, the support number is 0808 238 0000. For customers in Europe, the contact number is +44 (0) 870 850 1241.
By utilizing these contact options, you can reach out to Garmin and receive the assistance and support you need.
To ensure proper storage of the device when not in use, it is recommended to keep it in a dry and cool environment. Extreme temperatures and direct exposure to sunlight should be avoided. If you plan on storing the device for an extended period, it is advisable to remove it from any mounts or attachments and store it separately. By following these guidelines, you can maintain the device’s optimal condition for future use.
Certainly! Here are some guidelines on how to care for and maintain the transducer:
- Regular Inspection: It is important to routinely inspect the transducer for any signs of damage or debris accumulation. Check for any cracks, chips, or other physical damage that could affect its functionality.
- Gentle Cleaning: To ensure accurate sonar readings, clean the transducer gently. Use a soft cloth or sponge to remove any dirt, grime, or algae that may have accumulated on its surface. Avoid using abrasive materials or harsh cleaners that could scratch or damage the transducer.
- Mounting on the Hull: If the transducer is mounted on the hull of the boat, periodically check for any damage or wear that could impact its performance. Look for any cracks or loose fittings around the mounting area and address them accordingly.
- Cable and Connectors: Ensure that the cables connecting the transducer are securely attached and free from any damage. Inspect the cables for any signs of wear or corrosion, especially if you frequently use your equipment in saltwater environments.
- Dry and Clean Connectors: Keeping the connectors dry and clean is crucial for maintaining proper functionality. Regularly inspect the connectors for any signs of moisture or dirt buildup. If needed, use a soft cloth or brush to gently clean them. Consider applying a corrosion inhibitor to protect the connectors, following the manufacturer’s recommendations.
By following these guidelines, you can ensure the proper care and maintenance of your transducer, thus ensuring accurate sonar readings and optimal performance.
To properly clean the screen of your Garmin Striker device, follow these steps:
- Begin by using a soft, damp cloth to gently clean the screen. Make sure the cloth is not too wet to prevent any liquid from seeping into the device.
- Avoid using harsh cleaning agents or abrasive materials as they can cause scratches or damage to the display. Stick to using a mild cleaning solution if necessary, specifically designed for electronics.
- Rinse the device with fresh water after each use in saltwater. This step is crucial to prevent any potential corrosion from the saltwater. Ensure that no water seeps into any ports or openings on the device.
- Once you’ve rinsed the device with freshwater, use a clean cloth to gently dry the screen and any other wet areas. Make sure to remove any moisture completely before using the device again.
By following these steps, you can keep your Garmin Striker device’s screen clean and maintain its optimal performance for a long time.
To adjust the keel offset for depth measurements, follow these steps:
- Go to the Vessel-Specific Settings section.
- Look for the option called Keel Offset.
- Adjust the keel offset value to account for the depth of the keel below the water line.
- By setting the keel offset, you can measure the depth from the keel itself instead of relying on the transducer.
- To access the Keel Offset setting, navigate to ‘Settings’, then select ‘My Vessel’, and finally locate the option for Keel Offset.
- Enter the appropriate value in the Keel Offset setting based on your specific vessel’s keel depth.
- This adjustment will ensure accurate depth measurements by considering the keel’s position in relation to the water line.
To ensure accurate sonar readings, follow these steps to set the transducer type:
- Begin by accessing the settings menu on your device.
- Within the settings menu, locate and select the option labeled “My Vessel”.
- Once inside the “My Vessel” settings, you will find the “Transducer Type” option. Click on it.
- A list of available transducer types will be displayed.
- Carefully review the list and identify the type of transducer that you are using on your vessel.
- Select the appropriate transducer type from the list.
- After selecting the transducer type, save the changes by confirming your selection or following any on-screen prompts.
- Once the transducer type is set, your sonar system will be optimized to provide accurate readings based on the selected transducer.
By following these steps, you can easily set the transducer type on your device, enabling it to provide reliable and precise sonar measurements for your vessel.
To view GPS settings and status, you can follow these steps:
- Open the Settings app on your device.
- Scroll down and tap on the “System” option.
- Within the System settings, locate and tap on the “GPS” option.
- Here, you will be able to see various information related to the GPS, including satellite details and the current GPS accuracy.
To change the language setting on your Garmin Striker device, follow these steps:
- Access the device’s settings by navigating to the “Settings” menu.
- Within the settings menu, locate and select the “System” option.
- Look for the “Language” category and select it.
- You will be presented with a list of available language options.
- Choose the desired language from the list.
- The device will now display menus, prompts, and information in the selected language.
It’s important to periodically review and adjust these settings, especially if you are changing fishing environments or vessels. By setting the language correctly, you can ensure that your Garmin Striker device operates efficiently and provides accurate data for your fishing trips.
To ensure the utmost effectiveness of your alarm settings in accordance with your fishing and boating conditions, it is recommended to perform regular checks and updates. By doing so, you can ensure that your alarm settings are relevant to your current situation.
To adjust the sensitivity of each alarm, you can customize it based on your specific requirements and the surrounding environmental conditions. This will allow you to fine-tune the alarm’s sensitivity to ensure accurate and reliable notifications are provided.
To set an alarm on your Garmin Striker device, follow these steps:
- Go to the Settings menu on your device.
- Look for the “Alarms” option and select it.
- Next, tap on “System” to access the system settings.
- Within the system settings, you should see an option called “Alarm Clock.” Tap on it.
- From here, you can set a one-time alarm or a daily reminder.
- Adjust the time for the alarm by selecting the appropriate hours and minutes.
- Once you have set the desired time, save the alarm settings.
- Now your alarm is set on the Garmin Striker device and will sound at the designated time.
Whether you need to wake up early for an adventure or set a reminder for an important task, following these steps will help you easily set an alarm on your Garmin Striker device.
There are several sonar alarms available that can be customized to suit different underwater conditions. These alarms include the Shallow Water Alarm, Deep Water Alarm, Fish Alarms, and Water Temperature Alarm.
The Shallow Water Alarm is designed to trigger an alarm when the water depth becomes shallower than a specific limit. To customize this alarm, you can navigate to the settings menu, then select ‘Alarms’, followed by ‘Sonar’, and finally ‘Shallow Water’. Here, you can adjust the preset limit to your desired depth.
On the other hand, the Deep Water Alarm functions opposite to the Shallow Water Alarm. It alerts you when the water depth exceeds a particular limit that you have set. To customize this alarm, you can access the settings menu, choose ‘Alarms’, then ‘Sonar’, and finally ‘Deep Water’. Here, you can modify the specified depth to suit your preferences.
The Fish Alarms are used to detect the presence of fish. You have the option to customize the alerts for all sizes of fish or specific sizes. To set up these alarms, go to the settings menu, select ‘Alarms’, then ‘Sonar’, and finally ‘Fish’. From there, you can modify the settings to suit your fishing preferences, whether you want alerts for all fish sizes or only for particular sizes.
Lastly, the Water Temperature Alarm is designed to notify you when the water temperature varies beyond a specified range from a set point. This alarm is useful for identifying ideal water conditions for specific fish species. To customize this alarm, navigate to the settings menu, choose ‘Alarms’, then ‘Sonar’, and finally ‘Water Temp’. Here, you can adjust the parameters to define the desired temperature range for receiving alerts.
By customizing these sonar alarms for shallow water, deep water, fish detection, and water temperature variations, you can optimize your fishing experience based on your specific preferences and conditions.
The Garmin Striker series offers a range of alarms and notification settings to enhance your fishing and navigation experience. These settings can be customized to suit your preferences. Here are the various alarms and notification settings available on the Garmin Striker series:
Navigation Alarms:
- Arrival Alarm: This alarm can be set to notify you when you are approaching a specific distance or time from a destination or turn. It helps you stay on track and ensures you don’t miss important waypoints.
- Anchor Drag Alarm: Designed for when you’re anchored, this alarm alerts you if your boat drifts beyond a preset distance. It helps you keep your position and prevents any accidental drifting.
- Off Course Alarm: This alarm alerts you if your boat deviates from the predetermined course. It helps you stay on track and ensures you are navigating accurately.
Sonar Alarms:
- Shallow Water Alarm: This alarm is useful for avoiding shallow areas. It notifies you when the water depth is shallower than your predefined limit, helping you avoid grounding or other navigational hazards.
- Deep Water Alarm: Similar to the shallow water alarm, this alarm alerts you when the water depth exceeds your set limit. It is helpful for navigating in deep water and avoiding potential risks.
- Fish Alarms: The fish alarm feature detects suspended targets (fish) in the water. You can customize the alarm to alert you for all sizes of fish or specific sizes, allowing you to track and target fish more effectively.
- Water Temperature Alarm: This alarm notifies you when the water temperature varies beyond a specified range. It can be useful for finding favorable water conditions for specific fish species, optimizing your fishing strategy.
These alarms and notification settings can be accessed and customized through the Garmin Striker series’ menu under the respective categories of “Navigation” and “Sonar.” By utilizing these features, you can improve your fishing and navigation efficiency while ensuring a safer and more enjoyable experience on the water.
To create a route, follow these steps:
- Access the menu titled ‘User Data’ and navigate to the ‘Routes’ section.
- Click on ‘New’ and select ‘Use Waypoint Map’.
- Choose the starting location for your route and follow the instructions on the screen to add turns and waypoints.
To edit an existing route, follow these steps:
- Navigate to the ‘User Data’ menu and select ‘Routes’.
- Choose the specific route you wish to edit.
- Click on ‘Edit Route’ and make the necessary modifications, such as changing the name or adjusting the turns in the route.
To navigate using a route, follow these steps:
- From the ‘User Data’ menu, go to the ‘Routes’ section.
- Select the desired route.
- Choose either ‘Navigate To’ and then select ‘Forward’ to start from the beginning, or choose ‘Backward’ to start from the end of the route.
To delete a route, proceed as follows:
- Navigate to the ‘User Data’ menu and select ‘Routes’.
- Locate the route you want to delete.
- Confirm your intention to delete the route by selecting the ‘Delete’ option.
To manage waypoints, routes, and tracks on the Garmin Striker series, follow these instructions:
1. Creating Waypoints:
- Save your current location as a waypoint by pressing the waypoint key on any screen.
- Alternatively, go to ‘User Data > Waypoints > New Waypoint’ to create a waypoint at a different location. You can enter coordinates manually or select a location on the map.
2. Editing Waypoints:
- Access ‘User Data > Waypoints’ and select the waypoint you want to edit.
- Choose ‘Edit Waypoint’ to make modifications like changing the name, symbol, depth, or comment.
3. Navigating to Waypoints:
- On the waypoint map, locate and select the desired waypoint.
- Choose ‘Navigate Route > Go To’ to start navigation towards the selected waypoint.
4. Deleting Waypoints:
- Go to ‘User Data > Waypoints’ and select the waypoint you want to delete.
- Confirm the deletion by selecting ‘Delete’ and then ‘OK’.
5. Creating Routes:
- Access ‘User Data > Routes > New > Use Waypoint Map’.
- Select the starting location and follow the onscreen instructions to add turns and waypoints to the route.
6. Editing Routes:
- In ‘User Data > Routes,’ select the route you want to edit.
- Choose ‘Edit Route’ to modify elements like the name or turns in the route.
7. Navigating Routes:
- From ‘User Data > Routes,’ select the desired route.
- Choose ‘Navigate To’ and select either ‘Forward’ to start from the beginning or ‘Backward’ to start from the end.
8. Deleting Routes:
- In ‘User Data > Routes,’ select the route you want to delete.
- Confirm the deletion by choosing ‘Delete’.
9. Viewing and Using Tracks:
- Access the track feature under ‘User Data > Track’. A track is a record of your boat’s path.
10. Setting Track Color:
- Customize the track’s appearance by selecting ‘Track Options > Track Color’ and choosing a color.
11. Clearing Tracks:
- To clear the current track, navigate to ‘User Data > Track > Clear Track’ and confirm with ‘OK’.
12. Managing Track Log Memory:
- Under ‘Track Options,’ select ‘Record Mode’ to choose between ‘Fill’ (record until full) or ‘Wrap’ (overwrite oldest data) for track log storage.
13. Configuring Recording Interval:
- Adjust the frequency of track point recording under ‘Record Intervals’. You can choose between distance, time, or resolution-based intervals.
14. Deleting All Waypoints, Routes, and Tracks:
- For a complete reset, go to ‘User Data > Manage Data > Clear User Data > All > OK’. This will delete all waypoints, routes, and tracks from the Garmin Striker series.
When selecting the appropriate frequency for your fishing environment, it is important to consider factors that will affect the quality of your sonar readings.
Higher frequencies, such as 200 kHz, are ideal for shallow waters as they provide finer details and greater clarity. These frequencies are particularly effective for spotting smaller fish or objects close to the surface. On the other hand, lower frequencies, like 50 kHz, are better suited for deeper waters as they can penetrate further below the surface. While lower frequencies may sacrifice some level of detail, they are beneficial for detecting larger fish or objects at greater depths.
To determine the right frequency for your specific fishing environment, consider the depth of the water you will be fishing in, the size of the fish you are targeting, and the level of detail you require for a successful fishing experience.
The sonar range setting serves a crucial purpose in displaying the depth scale on your screen. Its main function is to allow you to determine the range or depth at which you would like to focus your attention. By manually adjusting the sonar range setting, you can specifically target a particular depth range, which proves particularly useful in areas where there are significant changes in depth.
To manually adjust the sonar range setting, you can make use of the controls provided by your sonar device. These controls may include buttons or knobs that allow you to increase or decrease the range. Depending on your device, you may have options to adjust the range in specific increments or continuously. By using these controls, you can fine-tune and narrow down the depth scale to concentrate on a particular depth range of interest.
Manually adjusting the sonar range setting gives you the ability to focus on specific depths and explore areas with varying depths more effectively. It allows you to tailor your sonar readings to meet the requirements of your fishing situation or any other marine activity you may be engaged in.
The auto gain feature operates by intelligently adapting the sensitivity of the device to suit the specific conditions of the water depth and clarity. It offers a convenient solution for both novice users and situations where the conditions may change periodically.
By adjusting the sensitivity automatically, this feature ensures optimal performance and accurate readings without requiring the user to manually calibrate the device. This not only simplifies the operation for beginners but also saves time and effort for experienced users who frequently encounter varying conditions.
Therefore, the auto gain feature proves to be highly beneficial in scenarios where water depth and clarity fluctuate, providing reliable results and enhancing the overall user experience.
Yes, you can save specific frequency settings for quick access on some models. This feature allows you to conveniently store and retrieve predetermined frequency presets whenever needed.
When it comes to frequency selection, there are different options available depending on your requirements and the depth of the water you are operating in. Higher frequencies are suitable for shallower water conditions and provide improved detail.
On the other hand, lower frequencies are more suitable for deeper water, ensuring better performance in such environments. So, the choices for frequency selection can be adjusted based on the water depth to optimize the level of detail and performance you require.
To choose the frequency for your sonar, you can follow these steps in the sonar view:
- Access the Menu: Locate and select the menu option within the sonar view. This will provide you with various settings and options to customize your sonar experience.
- Navigate to Frequency: Once in the menu, look for the ‘Frequency’ option. Click on it to enter the frequency settings section.
- Understanding Frequency Options: In the frequency settings section, you will be presented with various frequency options to choose from. It is crucial to select the frequency that suits your specific needs and the depth of the water you are navigating.
- Considering Water Depth: Higher frequencies offer better detail in shallower water, making them ideal for situations where you require intricate information about the underwater environment. On the other hand, lower frequencies are better suited for deeper water, where they can provide clearer readings.
- Choosing the Appropriate Frequency: Evaluate your needs and the water depth you will be operating in. Based on this assessment, select the frequency that best aligns with your requirements. Remember, higher frequencies for shallower water, and lower frequencies for deeper water.
- Saving Frequency Presets (optional): Depending on the model of your sonar, you may have the option of saving specific frequency settings as presets for quick access in the future. This feature allows you to conveniently switch between different frequencies without having to manually adjust the settings each time.
By following these steps, you can effectively choose the frequency that aligns with your needs and the conditions of the water you are exploring with your sonar.
The GPS functionality on the Garmin Striker device operates by searching for GPS satellite signals as soon as the device is powered on. This is crucial for accurately determining the current location of the device. Once a successful GPS lock is established, the device will display a specific icon or message to indicate the connection with the satellite and the acquisition of a precise geographic location.
However, certain factors can cause the device to lose satellite signals. For instance, if the device is in an area with obstructions such as tall buildings or heavy tree cover, it may hinder the GPS signals from reaching the device. Additionally, being indoors can also lead to signal loss. In such situations, a lost signal icon, often depicted as a flashing question mark, is displayed to notify the user that the device has temporarily lost its connection with the satellites.
To ensure optimal performance of your transducer, here are some useful tips:
- Location: Avoid selecting areas where the transducer’s view may be obstructed by the boat’s hull or other structures. To effectively gather accurate data, it is important to have a clear and unobstructed view for the transducer.
- Submersion: Always make sure that the transducer remains fully submerged in water during operation. Submerging the transducer ensures proper functioning and accurate readings. Therefore, it is crucial to avoid dry areas or having the transducer exposed to the air.
- Regular Maintenance: Conduct regular checks to ensure that the transducer is free from any debris or growth. Over time, debris such as algae or sediment can accumulate on the transducer, affecting its performance. Clean the transducer regularly to maintain optimal performance.
By adhering to these tips, you can maximize the performance of your transducer and obtain reliable and accurate data for your operations.
The Garmin Striker 4 GPS Fish Finder is equipped with various fishfinder and transducer functions that enhance its performance. The device comes with a 010-10249-20 transducer, which features a 4-pin connector. This transducer operates at 77/200 kHz and utilizes two cone-shaped beams. It employs a 45° beam for 77 kHz and a 15° beam for 200 kHz. Additionally, if you require deeper depth scanning capabilities, you can use the control unit with a 50/200 kHz transducer.
The Garmin Striker 4 is capable of operating with High and Mid CHIRP frequencies. The use of CHIRP sonar technology provides high-quality images and improves target definition, offering a clearer view of the bottom and reducing clutter on the screen. It also enables superior target separation compared to conventional sonar units. With CHIRP, tightly packed schools of fish will not appear as a single, larger target, addressing a common limitation of other sonar systems.
Moreover, the fishfinder function of the Garmin Striker 4 includes several useful features. The Fish Symbol ID function processes sonar returns differently and associates fish icons with them, making it easier to identify and track fish targets. It also displays the depth of each fish target, providing valuable information for anglers.
The device offers a Flasher mode, which presents depth readings in a circular format and provides details about sonar returns. The inner rings of the Flasher display depth information, while the flashing segments on the outer rings indicate the strength of different sonar returns. This feature is particularly beneficial for ice fishing or when fishing from a stationary position.
The A-Scope function, which is also a flasher display, presents vertical representations of the latest sonar returns. It offers real-time information about the presence and movement of targets detected by the sonar beams.
The Garmin Striker 4 includes an Auto Gain function that automatically filters out unwanted noise, eliminating the need for manual adjustments. This feature allows for a more precise and accurate sonar reading without the interference of irrelevant signals.
To accommodate high-speed scanning while in motion, the Striker 4 incorporates the Ultrascroll feature. It enables faster scrolling of sonar data, ideal for scenarios where the user is moving at higher speeds. However, it is important to note that at speeds exceeding 40 Mph, the image quality may decrease.
In summary, the Garmin Striker 4 GPS Fish Finder encompasses various fishfinder functions, such as Fish Symbol ID, Flasher mode, A-Scope, Auto Gain, and Ultrascroll. These features enhance the device’s performance by providing detailed information on fish targets, improved sonar image quality, and effective noise reduction, allowing anglers to make more informed decisions while on the water.
FAQs on Garmin Striker 4 Fishfinder
Conclusion
The Garmin Striker 4 is a budget-friendly fish finder suitable for beginners and budget-conscious fishermen. It features dual-frequency CHIRP sonar, a transducer, and internal GPS, but lacks preloaded maps or chartplotting. It has a small 3.5-inch color display, IPX7 waterproofing, and waypoints transfer via data cable.
Get the Garmin Striker 4 Fishfinder today to elevate your fishing game and start reeling in more fish.

Gary Burrell
Born in 1989, Gary Burrell is an Electrical Engineering graduate from the University of Tennessee. With 20+ years of experience, he has transitioned from engineering roles to becoming the Chief Content Editor. Gary’s unique blend of technical knowledge and editorial expertise has made him an essential figure in content creation, ensuring clarity and accuracy. His journey from an engineer to an editor showcases his adaptability and commitment to continuous learning.