How to Install a Garmin Fish Finder on Your Boat: A Step-by-Step Guide
Navigating the waters with precision requires top-notch equipment. Among the most sought-after tools for anglers and boaters alike is the Garmin Striker 7-inch Vivid model. This fish finder is famous for its advanced features.
It can track speed and track water temperature, making it a game-changer.
This guide will show you how to mount Garmin Fish Finder on your boat. It’s important to follow the steps carefully to fully use its potential.
Let’s dive right in!

Step-by-Step Process to Install a Garmin Fish Finder on Your Boat
1. Choosing the Right Fish Finder: The Garmin Stryker 7 inch Vivid Model
Before we get into the installation process, it’s essential to understand why we prefer the Garmin Stryker. The 7-inch screen provides ample space to view all necessary data. Its latest vivid model is a testament to Garmin’s commitment to quality and functionality.
2. Mounting the Fish Finder: Using the Scotty Mount
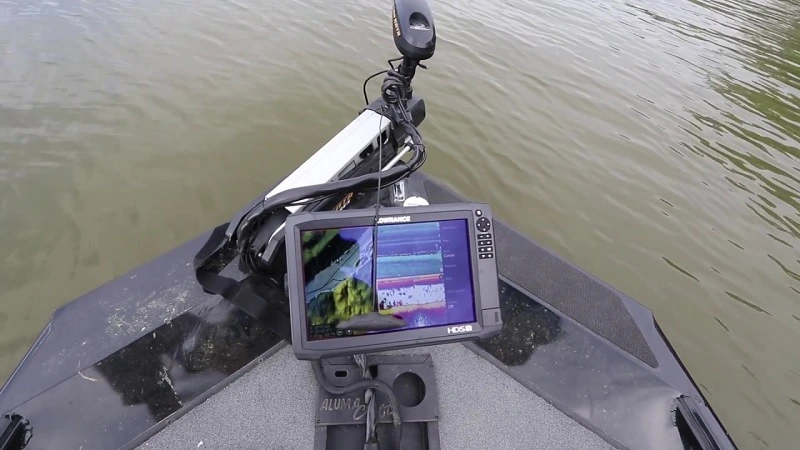
For mounting the Garmin Stryker, we rely on the standard Scotty mount paired with the GPS fish finder 7-inch adapter plate. The beauty of our system is its plug-and-play nature. Here’s how you can set it up:
Attach the fish finder to the base plate.
Connect it to the boat’s power source.
3. Managing the Wires: Shielded Loom and Zap Straps
To keep everything tidy and safe, we:
- Use a shielded loom for the wires.
- Employ removable zap straps to tie the wires around the boat’s wrap-around lifeline. This ensures the wires stay in place and don’t interfere with the boat’s operations.
4. Setting Up the Transducer: Modified Suction Cup Mount
The transducer is a crucial component of the fish finder system. Here’s how we mount it:
- Use a modified suction cup mount (not included with the Garmin Stryker). This mount is easily available on platforms like Amazon.
- Attach the transducer to the suction cup and secure it with a bolt.
- For added safety, use a large removable zap strap to connect the transducer to the welded towing eye present at the back of our Stryker boats. To prevent the transducer from getting stuck in the propeller or disconnecting, there is redundancy in place. Even if the suction cup fails, the transducer will still be safe.
5. Quick Setup and Dismantling
One of the significant advantages of our system is the speed of setup and dismantling. Here’s a quick rundown:
- Connect the positive and negative terminals.
- Tuck any loose wires out of the way.
- When dismantling, simply remove the terminals, wrap up the wires, and use the removable zap strap to secure everything.
6. Storing the System: Keeping Everything Organized
After a day out on the water, it’s essential to store the fish finder system properly. We recommend:
- Keeping the entire system, including the loom, in a dedicated bucket.
- Store this bucket with other Scotty accessories for easy access.
Conclusion: Adapting the Garmin Stryker Installation Guide to Different Boats
The Garmin Stryker 7 inch Vivid Model installation guide provided is primarily tailored for boats similar to those used by us. However, when considering Mounting the Fish Finder on different vessels, nuances arise:
- Fiberglass Boat: While the Scotty Mount might be a universal choice, special care is needed for fiberglass boats. Using suction cups or adhesive mounts might be more suitable than drilling to avoid damaging the boat’s surface.
- Kayak: In the context of Managing the Wires, kayaks present a unique challenge. Because of the limited space, it’s important to pay extra attention to wire management. This will ensure that the wires don’t get in the way of paddling or affect the stability of the kayak.
- Pontoon Boat: When it comes to Setting Up the Transducer, pontoon boats, with their spacious design, offer flexibility. However, optimal placement for viewing and accessibility is crucial.
- Aluminum Boat: For those using the Modified Suction Cup Mount on an aluminum boat, specific tools and precautions are necessary. To avoid corrosion, be careful when drilling into aluminum and placing the transducer on the boat.
In conclusion, our guide’s steps can be used for various boats. Yet, you need to adjust them according to the specific type and design of each boat. Always focus on safety and functionality, regardless of where you store the system. Always consult with marine professionals for tailored advice. Safe boating and happy fishing!
Gary Burrell
Born in 1989, Gary Burrell is an Electrical Engineering graduate from the University of Tennessee. With 20+ years of experience, he has transitioned from engineering roles to becoming the Chief Content Editor. Gary’s unique blend of technical knowledge and editorial expertise has made him an essential figure in content creation, ensuring clarity and accuracy. His journey from an engineer to an editor showcases his adaptability and commitment to continuous learning.

